The littleBits Invention Cycle
SESSION ROLES:
🐙 = Site Coordinator
🦉= Mentor
A Note for Site Coordinators and Mentors
This session guide provides a detailed outline for the Invention Cycle activity, but feel free to improvise or put your own spin to things. If you have an idea for a challenge or prompt that will get students excited, go for it! If something is not working well, change course and experiment another path forward.
If you do change things up, we would love to hear what has been successful for you!
Session Overview
This session will introduce students to the littleBits Invention Cycle, a framework that can help guide the invention and engineering design process.
In this session, students will combine littleBits, accessories from the kits, and paper to create simple moving inventions. Each invention will go through an entire Invention Cycle. You will start by building a tail-wagging creature. Then they will create a sound-sensing trick candle.
If time at the end of the session, students will participate in mini-challenge where they invent their own moving invention from scratch.
Session Details
Difficulty:
Beginner
Duration:
2 hours
Subjects:
Engineering
Art/Design
Science
Prerequisite Knowledge:
Supplies
Bits + Accessories:
DCI STEM Kit
Device: Mentors will need to bring a connected device (phone, tablet, or computer) to access instructional videos
Other Materials:
Extra 9V batteries
Colored Paper
Markers
Tape
Tools Used:
Scissors
Description
Theme: Invention Cycle
Objectives: By the end of the session, students will be able to:
-
Create a circuit containing a power source, inputs, outputs and wires
-
Identify and explain the value of each phase of the Invention Cycle
-
Explain how the servo works and different ways it can be used to make things move
Resources
Inspirational Links:
Helpful Links:
Tips + Tricks:
Set Up
🐙SITE COORDINATORS:
-
Make sure all the supplies for this session are prepped and ready to go. Each student should have access to paper, markers, scissors, and tape.
-
We suggest handing out the kits during the INVENT phase, after the introduction.
🦉MENTORS:
-
Make sure to bring a charged connected device (phone, iPad, or computer) to access instructional videos during the session.
Meet Up
5 MIN
🐙SITE COORDINATORS:
-
Take attendance and make sure mentors are paired off.
🦉MENTORS:
-
Take turns asking each other questions. Example prompts:
-
How was your week?
-
What's one thing you created or invented this week?
-
Introduce
10 MIN
🐙SITE COORDINATORS INTRODUCE THE SESSION
Invention Cycle
Lots of designers and engineers have a process they go through when inventing. This is the process the team at littleBits uses when they create new Bits and Kits. Students will also be using it when they complete their littleBits challenges.

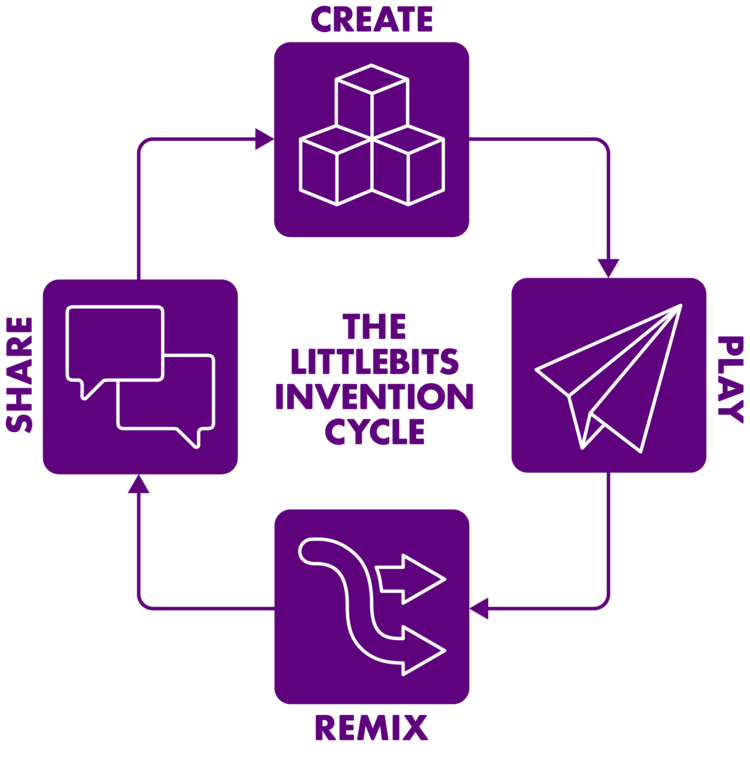
There are four stages to the littleBits Invention Cycle:
-
CREATE is where you brainstorm ideas, explore Bits, and create a first model or prototype.
-
PLAY is where you test your prototype. As you play, you identify what’s working well and come up with improvements or changes along the way, this is called iteration.
-
REMIX might remind you of your favorite song remix, and it is sort of like that. When you remix in the design cycle, you re-make your invention, but you change one or more things about it.
-
SHARE is an essential part of the design process. There are lots of ways and lots of reasons to share your work. Sharing your work allows you to get useful feedback, new ideas, and inspire others. You can share with classmates, friends, your family, or other inventors. When we share our ideas and inventions, our invention has a real world audience. Sharing your littleBits inventions on this website allows inventors around the world to see and celebrate the innovative work you have done.
Whenever you work with littleBits, keep the littleBits Invention Cycle in mind. There is no correct order and you may go back and forth in the cycle several times, or even skip stages. But understanding the littleBits Invention Cycle helps you understand how many designers and engineers work to solve real-world problems. Failure, trial and error, iteration, celebration - these are all parts of the design process, and you just did it!
Let’s put the Invention Cycle into practice through building inventions that move. You will start off by building a tail wagging creature. Then you will make an electronic trick candle. If there is time at the end, you can make a moving invention of your own!
Inspire:
10 MINS
🦉MENTORS REVIEW SESSION INSPIRATION VIDEOS AND PROMPTS
Career Exploration
As a warm up activity, mentors will explore two women in STEM who have made significant contributions to their field. Please take a few minutes to review the bios provided in the postcards below and brainstorm with your mentee what contributions they would make as a leader in this field fifteen years from now. Ask your mentee(s) the following:
- Can you see yourself in her job?
- Are you interested to learn more about her job?
- What inspires you about this role model?
(Expand on some phrases or words that may be difficult to understand.)
*The purpose of the postcards are meant to provide the career endeavors and examples of STEM positions of successful women in STEM to inspire them and explore different types of careers in STEM.*


Download Women in STEM postcards here:
GRACE HOPPER LESHELLE MAY
Create:
TAIL WAGGING CREATURE
30 MIN
🦉MENTORS:
Facilitate the INVENT activities with mentees.
🐙SITE COORDINATORS:
During the INVENT activities, float around the room and observe/help out where needed. You will also monitor the time and announce when the group should come together to share.
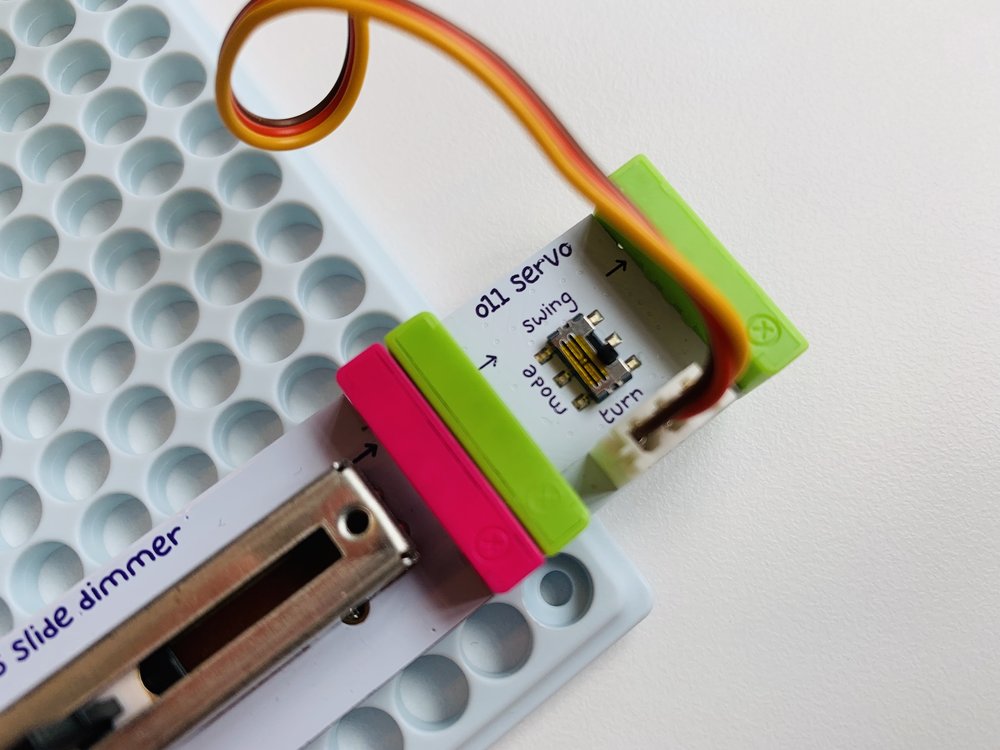
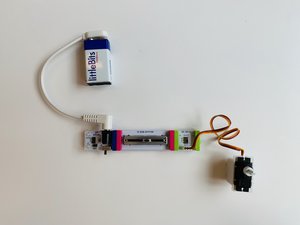
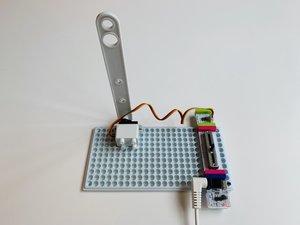
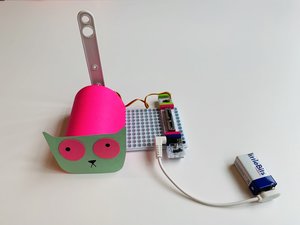
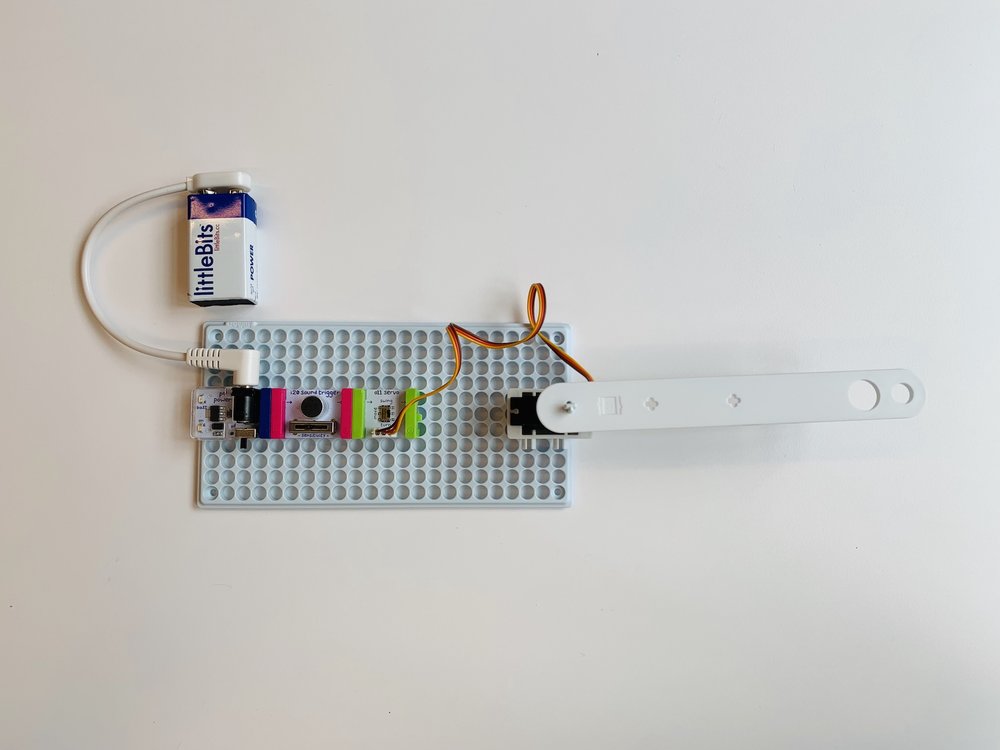
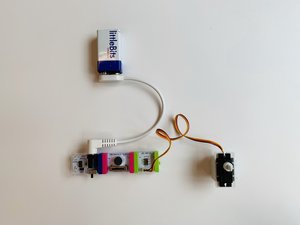
Tail Wagging Creature
Create a cute animal friend that automatically wags its tail!
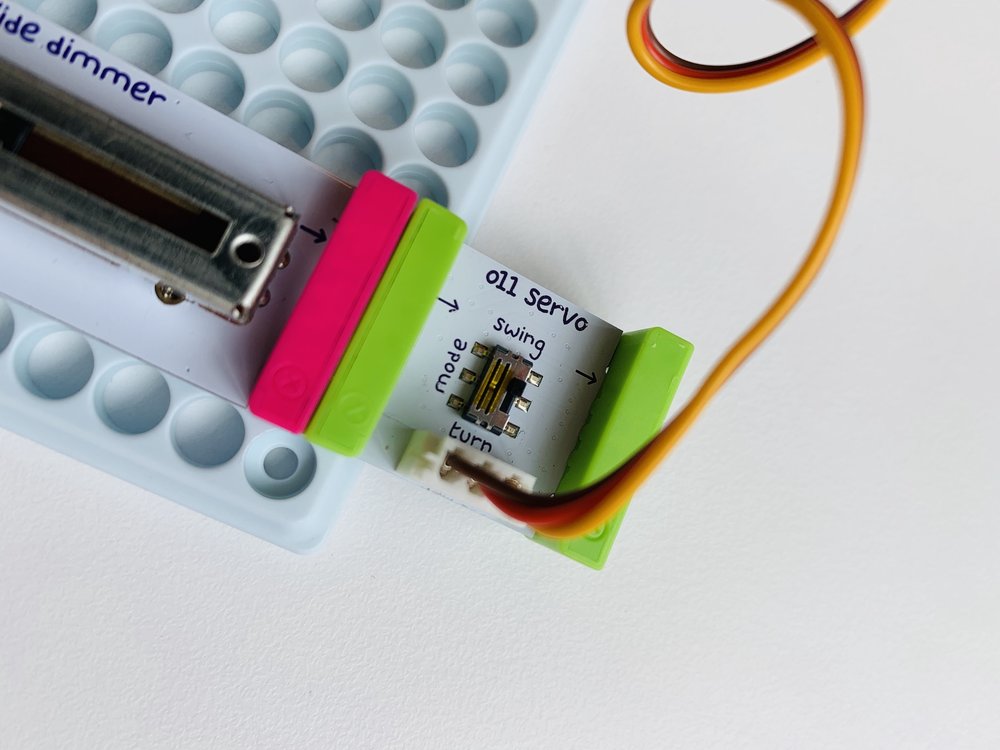
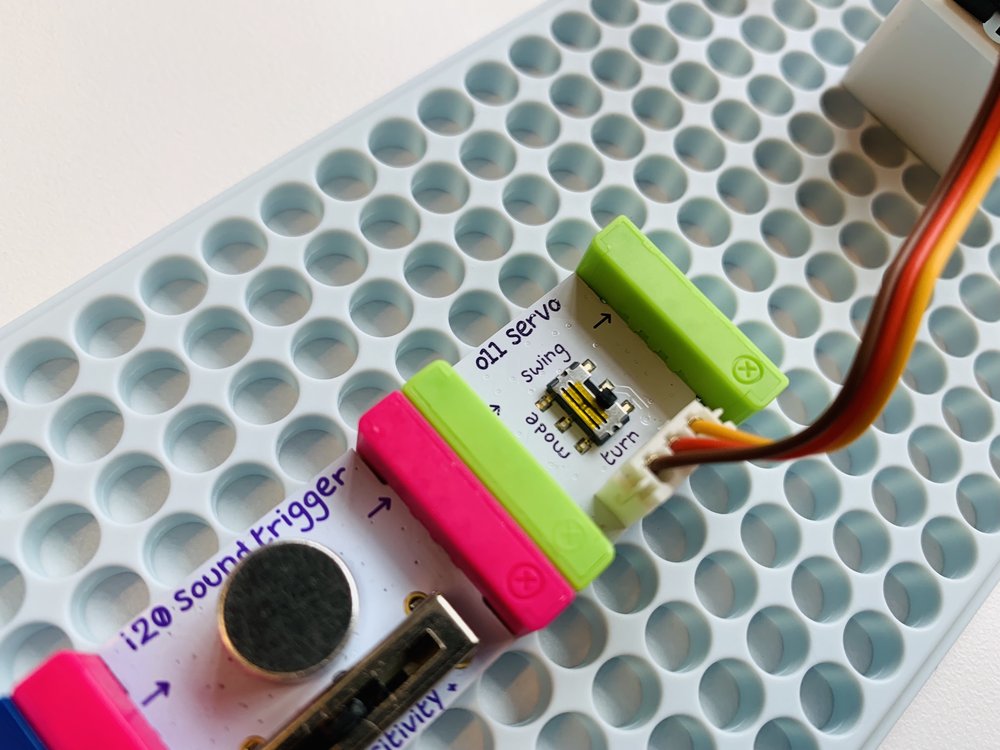
CREATE: Follow these step by step instructions.
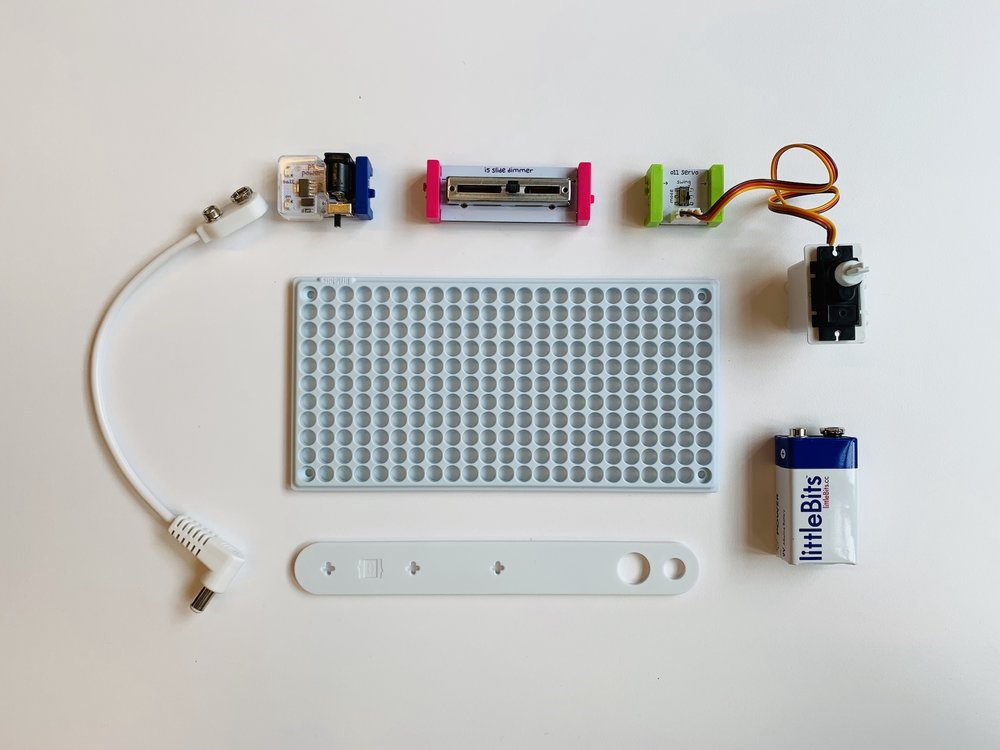
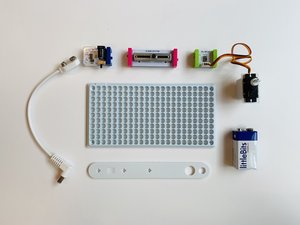
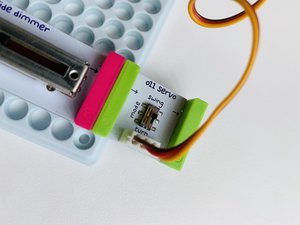
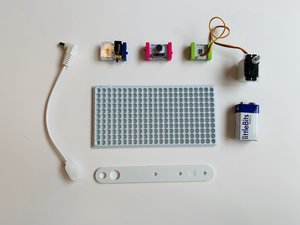
Step 1: Gather these Bits and Accessories


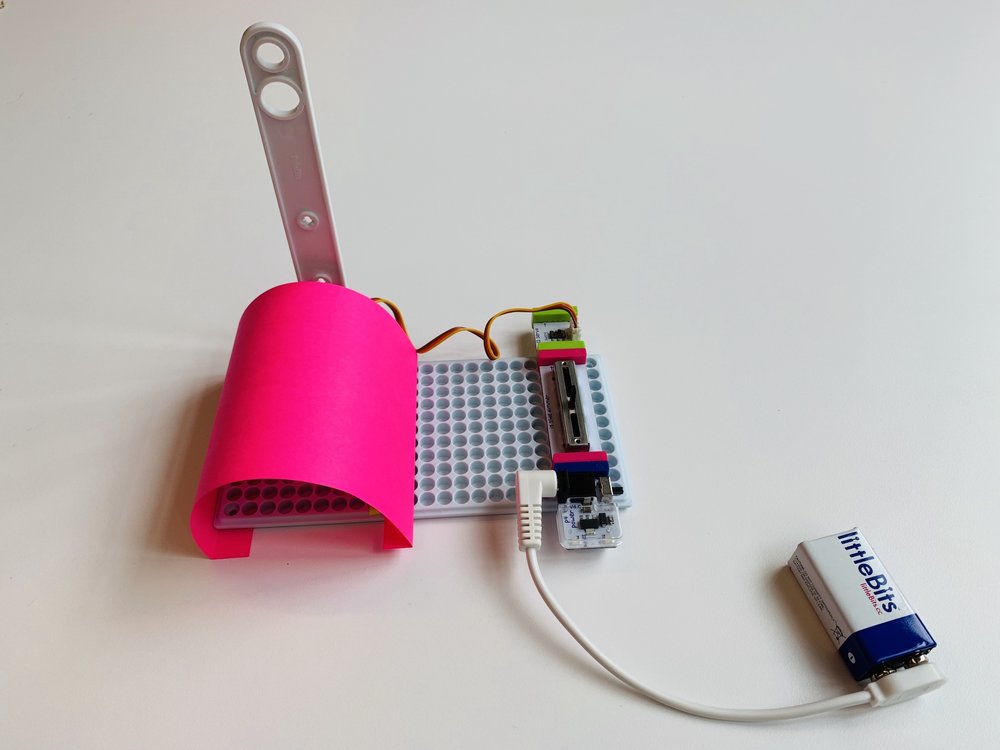


PLAY: Try out your invention!
-
To use your invention, power on the circuit. Adjusting the slider on the dimmer will change the tail’s speed.
-
What other things in the world that have a similar function to the servo’s motion?
-
Ex: Metronome
-
REMIX: Update or improve your creature. How can you use Bits and craft materials to improve or customize your invention Here are some ideas:
-
Add an additional output to your circuit. How does this change what your creature does?
-
Swap out the slide dimmer for another input Bit. How does it change the way your creature interacts?
-
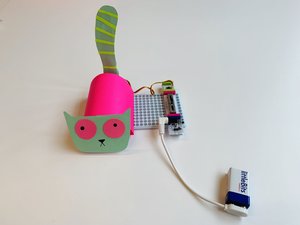
How can you modify the look of your creature? Can you transform it from one animal to another using paper or stickers?
SHARE: Share your invention!
-
Create a story about their creature and verbally present their story to the group.
-
Talk about the updates or unique features you added to the original prototype and why you decided to make these changes.
-
Snap photos of your final invention!
Congratulations! You just completed your first Invention Cycle! Let’s try it again with a new invention.
Invent:
TRICK CANDLE
30 MIN
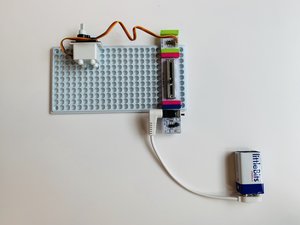
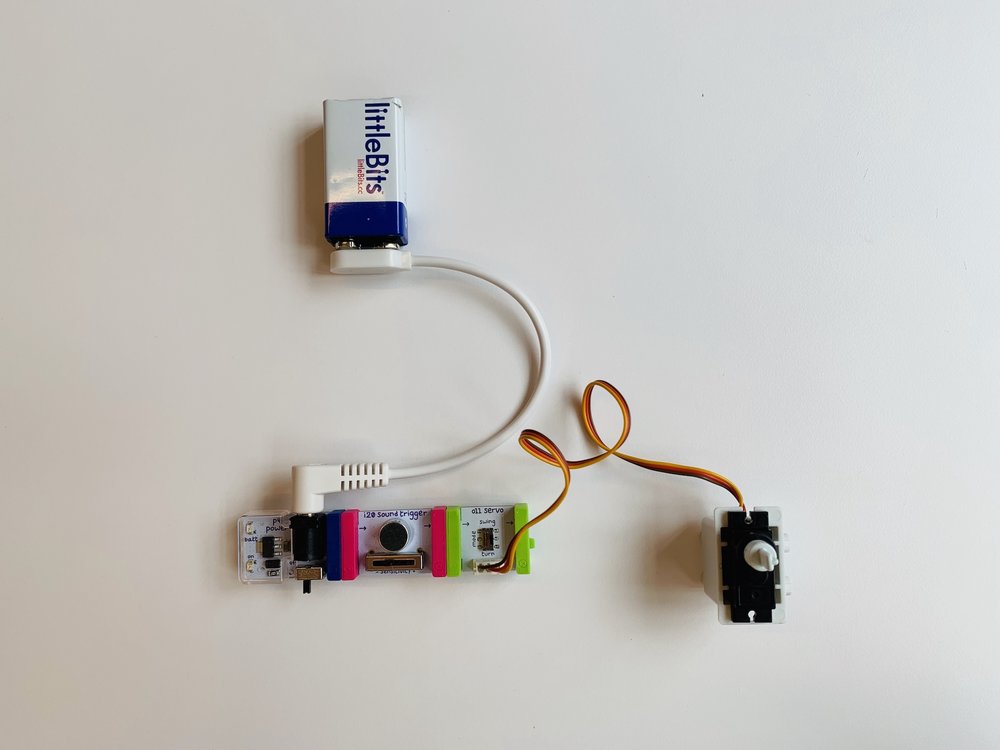
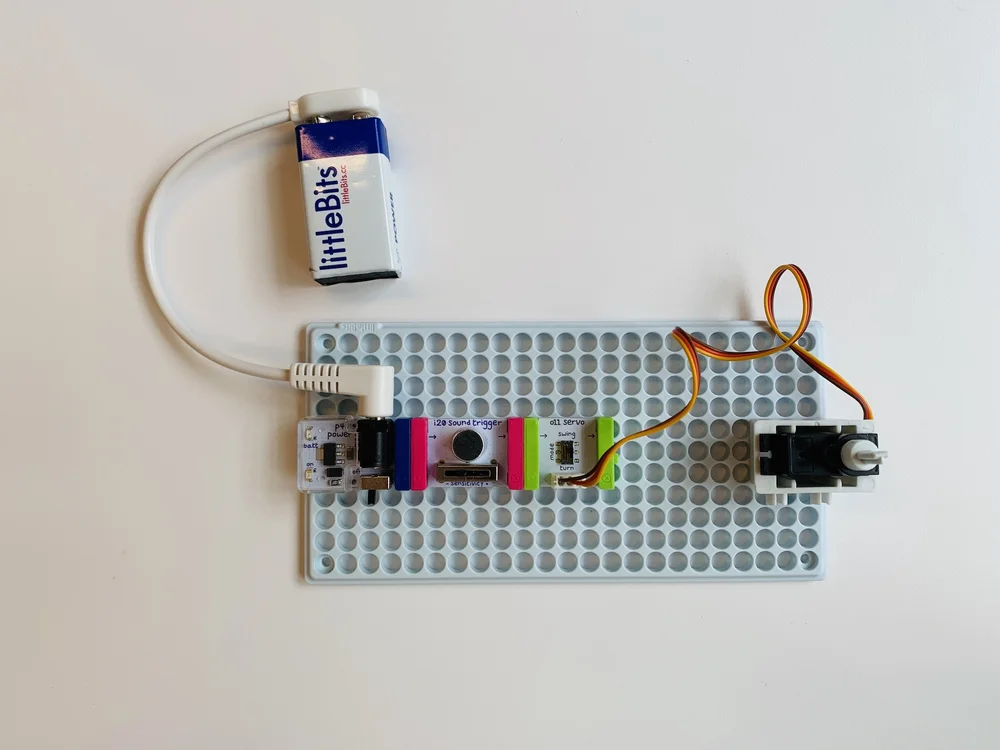
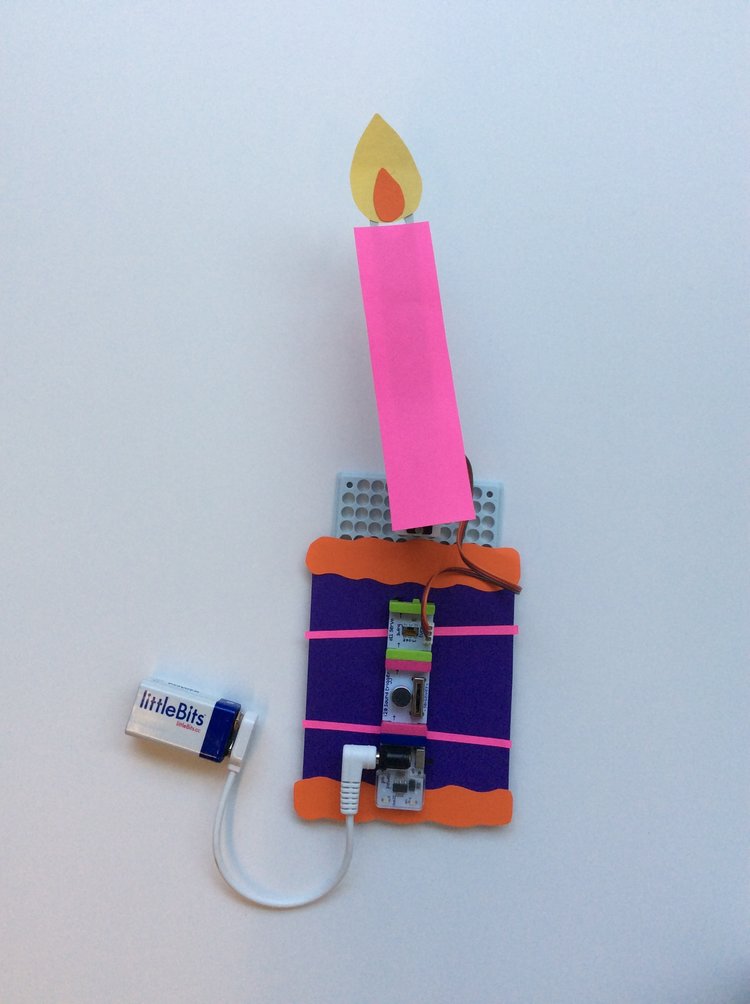
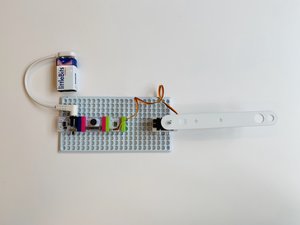
Trick Candle
This candle flips down when you blow on it, then back up. Use it to trick your friends!
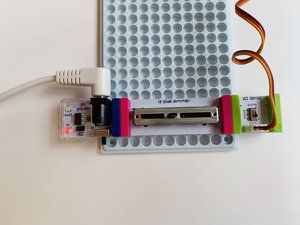
CREATE: Follow these step by step instructions.

Step 1: Gather these Bits and Accessories


PLAY: Try out your invention!
-
Power on your circuit and blow on the sound trigger! The servo should flip down and back up.
-
Adjust your mechanical arm and the sensitivity on the sound trigger until your invention works how you want.
REMIX: Make your trick candle even better! How can you use Bits and craft materials to improve or customize your invention Here are some ideas:
-
Add outputs. You can try adding sound or light. What Bits can help make the celebration more fun?
-
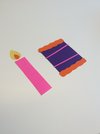
Decorate your cake! Use paper and stickers to make it unique.
SHARE: Share your invention with another group.
-
Talk about the updates or unique features you added to the original prototype and why you decided to make these changes.
-
Snap photos of your final invention!
Reflect
20 MIN
🐙SITE COORDINATORS:
Gather students together to reflect on their process. The goal of this discussion is to reflect on the design and engineering process so you can draw connections between their methods of working and the littleBits Invention Cycle.
Create four empty columns on a whiteboard (or use four large sheets of paper). Each column will help explain a step of the Invention Cycle, but don’t label the columns yet.
In the first column, you will put responses relating to the Create phase. To get students thinking about how they got started, you could ask:
-
How did you come up with ideas for what to build?
-
How did you decide what to do first?
-
Were everyone’s designs the same?
-
Was your project complete after putting it together the first time? Why not?
In the second column, you will put responses relating to the Play phase. To get studnets to think about how they used and tested their prototypes, you could ask:
-
Why is it important to test what you are working on?
-
What did you learn from playing with it?
-
Did anyone’s invention not work the way they hoped when they played with it?
-
What could you do with what you learn from testing?
-
Was your invention complete after using it the first time? Why not?
In the third column, you will put responses relating to the Remix phase and how they experimented with and improved their inventions, you could ask:
-
Did anyone make changes or improvements to their inventions after playing with them?
-
Did anyone try more than one approach/method?
-
What was the weirdest idea you tried? What did you learn from it?
-
How many different ideas do you think you tried?
-
How did you decide which method was the best?
-
Why might you want to try more than one way of doing something?
In the fourth column, you will put responses relating to the Share phase. To get students thinking about how to share and why it is important, you could ask:
-
After seeing what others have done, do you think you could do it even better now?
-
Were there ideas others had you would like to try?
-
Did anyone have something to say to you about your invention, maybe some praise or a suggestion?
-
Why might you want to share the work you’ve done with others?
-
Why might you want to listen to others share what they’ve done?
Give a preview of the next session:
-
Next week, we will learn about sensors and build The Navigator, a handheld device that helps you navigate in the dark.
Close
10 MIN
Wrap Up
🦉MENTORS:
-
Make sure to power off the Power Bit and disconnect the battery.
-
Deconstruct inventions: Make sure to take pictures of what students have made.
-
Clean up: Make sure you have all the parts shown on the side of the box and put them away in the kit.
🐙SITE COORDINATORS:
-
Store kits away for next time