The Navigator

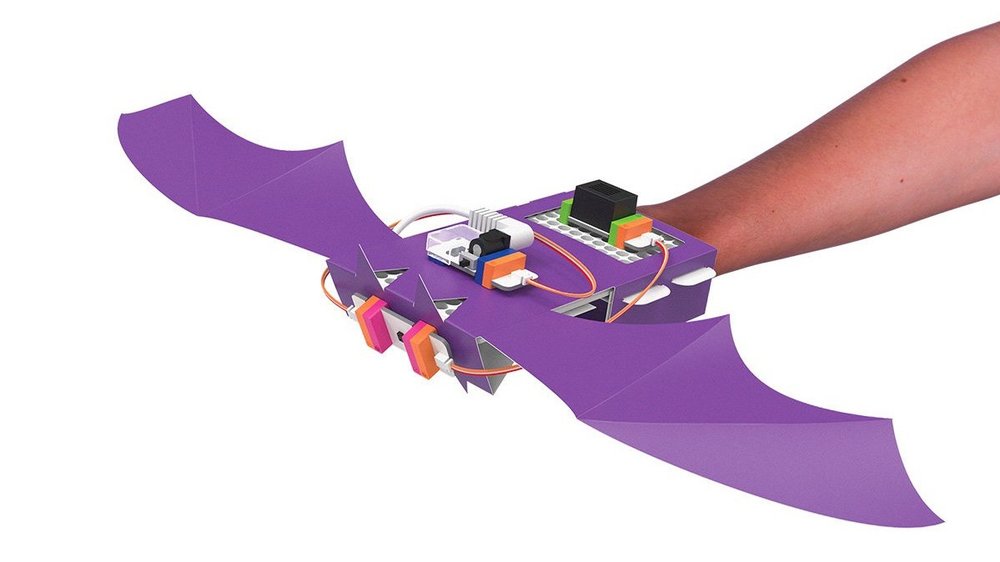
Build a handheld device that allows you to navigate in the dark!


As you work through the session, make sure to review all Bit diagrams to learn how Bits work and how they relate to the real world. You can also find information about each Bit in the Snap the Gap STEM Bit Index.

littlebits_base_inventor_kit_5_-_tejar.jpg


Inspire


Career Exploration

Explore these two women who have made significant contributions to STEM fields. Please take a few minutes to read their stories in the postcards below and think about the following:

- Can you see yourself in her job?

- Are you interested to learn more about her job?

- What inspires you about this role model?

KatherineJohnson.png


Dr.JedidahIsler.png

Download Women in STEM postcards here:

KATHERINE JOHNSON DR. JEDIDAH ISLER


INSPIRATIONAL INVENTION VIDEO OF THE DAY

Kid Inventor Anahit invented echolocation device for detecting obstacles in low/no visibility conditions and for blind people.


Create


The Navigator

Build a handheld device that allows you to navigate in the dark.
littlebits_base_inventor_kit_5_-_tejar.jpg

CREATE: Watch the video playlist below to learn how to build the Navigator:

  1. Intro to Wearables

  2. Create Navigator

CREATE: View the following photo slideshow on how to build your Navigator invention.

  1. Building your Template

  2. Building your Circuit

  3. Building your Invention

TEMPLATE THUMBNAIL.png

Step 1: Find Template #4 in your Kit.

Step 2: Start by folding all the solid lines upward towards yourself like so.

Step 3: Start by folding all the dotted lines downward away from yourself like so.

Step 4: Begin matching the numbered faces and numbered tabs & slots together in order starting with #1 and ending with #6.

Step 5: See how faces #1 are folded and matched together.

Step 6: Now, lets move on to the tabs marked 2 and 3.

Step 7: As you insert the tabs into the matching slot, make sure to slightly lift up and pull tabs to lock in place.

Step 8: Open up the tabs numbered 4 & 5 on the edge opposite of the ones you just locked in place and pull through the matching slots.

Step 9: Then take the tabs that are facing up and carefully push them into the openings.

Step 10: Now flip over the template and fold down face #6 onto matching face #6.

Step 11: See face #6 folded over face #6 here.

Step 12: Now fold any dotted and solid lines back in place if needed.

Step 13: Flip your template around and it is ready to go.

CIRCUIT THUMBNAIL.png

Step 1: Now it is time to build your circuit by plugging your battery into your power bit, snap orange wire to power bit, add the proximity sensor, the wire, and then the buzzer.

INVENTION THUMBNAIL.png

Step 1: Start by sliding your mounting board into open slot on your Navigator template like so.

Step 2: Flip your template over and attach the battery to bit holder + holes marked "C."

Step 3: See how the battery is now attached to the bit holder "C."

Step 4: Next, attach the power bit to the bit holder marked "A."

Step 5: Attach the proximity sensor to bit holder marked "B."

Step 6: See how the proximity sensor is attached to the template.

Step 7: Add the buzzer to the mounting board.

Step 8: If needed, add wires to hide any wires or add tape to tape down tabs. Now your invention is complete!

TEMPLATE THUMBNAIL.pngStep 1: Find Template #4 in your Kit. Step 2: Start by folding all the solid lines upward towards yourself like so.Step 3: Start by folding all the dotted lines downward away from yourself like so. Step 4: Begin matching the numbered faces and numbered tabs & slots together in order starting with #1 and ending with #6. Step 5: See how faces #1 are folded and matched together. Step 6: Now, lets move on to the tabs marked 2 and 3. Step 7: As you insert the tabs into the matching slot, make sure to slightly lift up and pull tabs to lock in place.Step 8: Open up the tabs numbered 4 & 5 on the edge opposite of the ones you just locked in place and pull through the matching slots.Step 9: Then take the tabs that are facing up and carefully push them into the openings.  Step 10: Now flip over the template and fold down face #6 onto matching face #6. Step 11: See face #6 folded over face #6 here. Step 12: Now fold any dotted and solid lines back in place if needed.Step 13: Flip your template around and it is ready to go. CIRCUIT THUMBNAIL.pngStep 1: Now it is time to build your circuit by plugging your battery into your power bit, snap orange wire to power bit, add the proximity sensor, the wire, and then the buzzer.INVENTION THUMBNAIL.pngStep 1: Start by sliding your mounting board into open slot on your Navigator template like so.Step 2: Flip your template over and attach the battery to bit holder + holes marked "C."Step 3: See how the battery is now attached to the bit holder "C."Step 4: Next, attach the power bit to the bit holder marked "A."Step 5: Attach the proximity sensor to bit holder marked "B."Step 6: See how the proximity sensor is attached to the template.Step 7: Add the buzzer to the mounting board. Step 8: If needed, add wires to hide any wires or add tape to tape down tabs. Now your invention is complete!


Play


PLAY: Try out your invention! 


Click the image to play the video

Once you have been built your Navigator invention, test it out to make sure it works.

  • Is your invention sensing objects in front of it?

  • What is the ideal distance for sensing objects in front of you?


Remix

REMIX: Update or Improve your Prototype

How can you use Bits and craft materials to improve or customize your invention?

Here are some more ideas:

  • Try using your Navigator in different places/scenarios: 

    • Can you use for something else besides navigating? Can it be a prank? An intruder alert?

nav 3.png

  • Experiment with Bits:

    • Try swapping the Sound Trigger Bit in place of the Proximity Sensor Bit.

      • How does this change the function of your navigator?

        • Hint: try shaking your arm :)

    • Try adding other Bits.

      • What happens if you add a Long LED?

      • How could this improve your wearable device?

    • How could the navigator be adjusted for someone with a hearing disability?

  • Add Other Craft Materials:

    • Customize your Navigator.

      • How would someone know it is yours?

        • Hint: Add your name with marker or stickers to your Navigator.

    • Wrap a paper cup or cone around the speaker to make it louder.


SHARE: Share your invention with friends or family! 

Here are some ideas how you can share your invention:

  • Create a story about your invention.

  • Talk about the updates or unique features you added to the original prototype and why you decided to make these changes.

  • Snap photos of your final invention and send to your site coordinator!

Share

CONGRATULATIONS, YOU HAVE COMPLETED YOUR PROJECT!


Resources

Inspirational Links:

Bat Vision Invention

Helpful Links:

DCI STEM STEM Kit Overview

DCI STEM STEM Kit Bit Index

littleBits Basics

littleBits Troubleshooting

littleBits Invention Cycle