Robo Arm

Robo Arm

Create a gripper device that helps you grab stuff!


As you work through the session, make sure to review all Bit diagrams to learn how Bits work and how they relate to the real world. You can also find information about each Bit in the DCI STEM STEM Kit Bit Index
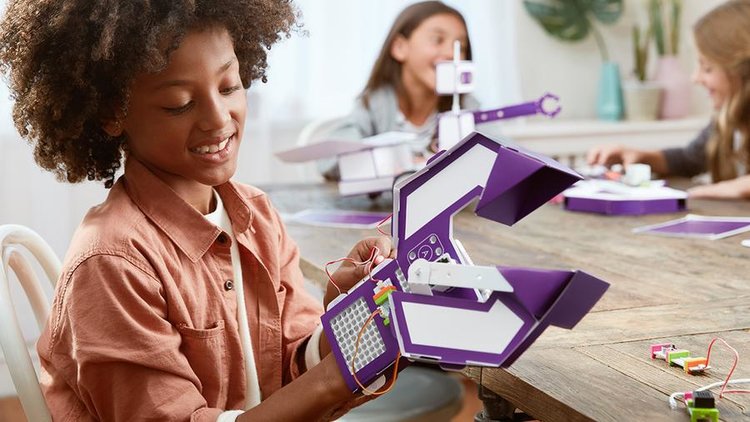
robo arm.jpg


Inspire


Career Exploration

Explore these two women who have made significant contributions to STEM fields. Please take a few minutes to read their stories in the postcards below and think about the following:

- Can you see yourself in her job?

- Are you interested to learn more about her job?

- What inspires you about this role model?

UmaChowdhry.png


GwynneShotwell.png

Download Women in STEM postcards here:

UMA CHOWDHRY GWYNNE SHOTWELL


INSPIRATIONAL INVENTION VIDEO OF THE DAY

These videos show different ways in which machines can help people in their daily lives.


Simone Giertz Nose Blowing Machine - engineer who makes hilarious “helpful” machines


Create


Robo Arm

Create a gripper device that helps you grab stuff!
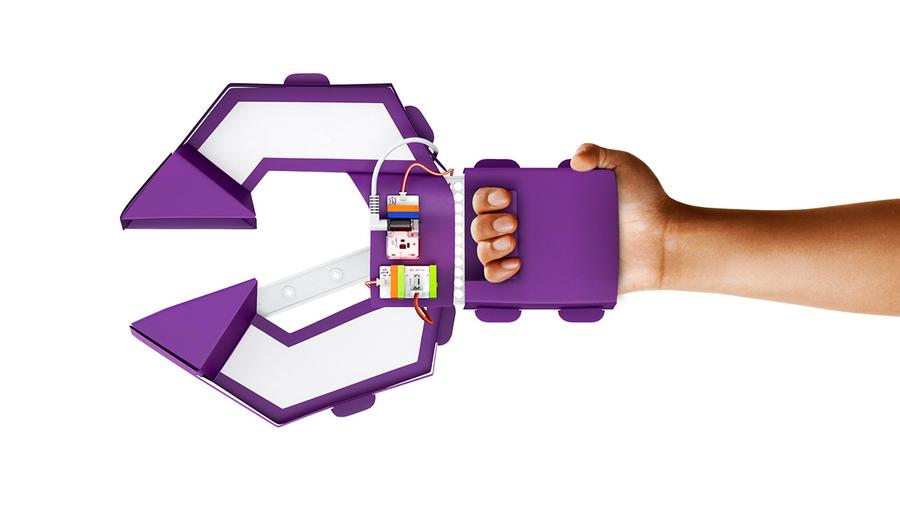
BIK-4_900x.jpg

CREATE: Watch the video playlist below for building instructions to create the Gripper.

  1. Intro to Wearables

  2. Create Gripper

CREATE: View the following photo slideshow on how to build your Robo Arm/Gripper invention.

  1. Building your Template

  2. Building your Circuit

  3. Building your Invention

T-1.png

Step 1: This invention requires us to build out three templates. The first template is Template #2.

Step 2: Template #2 is the one on the left, save the one on the right for later but not now.

Step 3: Start folding and unfolding all the dotted lines downward like so.

Step 4: Then start folding and unfolding all the solid lines upward like so.

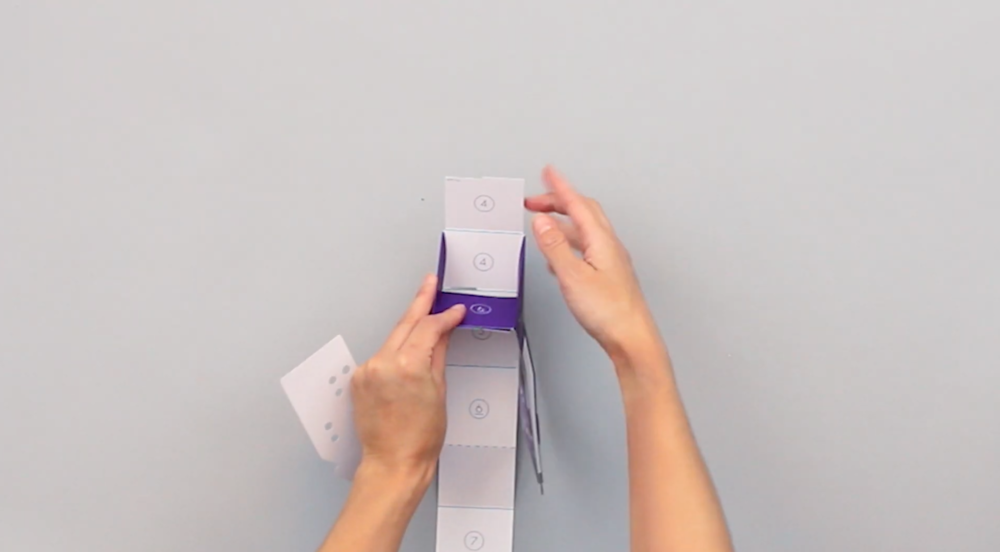
Step 5: Next, start folding and matching the numbered faces in order from #1 to #7.

Step 6: See how Face #1 and #2 are folded onto their matching faces.

Step 7: Now, let's fold together Face #3 to match with the other face #3

Step 8: Fold numbered faces #3 together like so.

Step 9: Fold face #4 to match with other face #4.

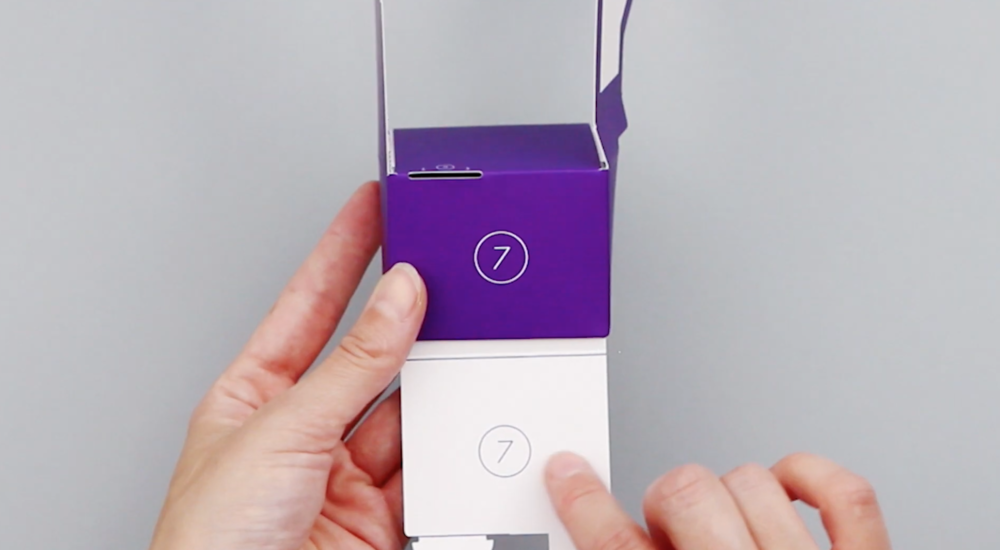
Step 10: Continue folding face #5, #6, #7 to match with their opposite faces.

Step 11: Next, insert tab #8 into slot #8.

Step 12: Now, lets fold the faces #9 together.

Step 13: Hold the faces together and insert the tabs into the slots to hold in place.

Step 14: This is one side of the Gripper. Now lets move onto the next template.

Step 15: This time we will be working with Template #1.

Step 16: Fold and unfold all dotted lines downward like so.

Step 17: Fold and unfold all solid lines upward like so.

Step 18: Now, lets start folding and matching the numbered faces in order from #1 to #9.

Step 19: Next, fold together and match numbered Face #3.

Step 20: See how the face #3 is folded together with the other face #3.

Step 21: Next, fold and match numbered face #4 with the other face #4.

Step 22: Fold and match numbered face #5 with other face #5.

Step 23: Fold and match numbered face #6 with the other face #6.

Step 24: Fold and match numbered face #7 with the other face #7.

Step 25: Insert tab #8 into slot #8.

Step 26: Fold together and match face #9 with the other face #9.

Step 27: Hold the faces together and insert the tabs into the slots to hold in place.

Step 28: Now, your second piece is finished. Next, we will move onto our last template to build.

Step 29: The last template we will build is Template #3.

Step 30: Start by folding and unfolding all dotted lines downward and solid lines upward like so.

Step 31: Next, fold and match numbered tabs and faces in order from #1 to #6.

Step 32: Next, insert tabs #2 and #3 into slots #2 and #3.

Step 33: Fold at the solid line to insert the tabs #2 and #3 into the slots like so.

Step 34: Pull the tabs and lock them into place like so.

Step 35: Next, insert tabs #4 and #5 into matching slots #4 and #5. like so.

Step 36: Then fold the tabs facing upwards into the slots to hide them.

Step 37: Flip over the template and fold face #6 over matching other face #6.

Step 38: Now, you have the last finished template. Now to build our circuit for the invention.

C.png

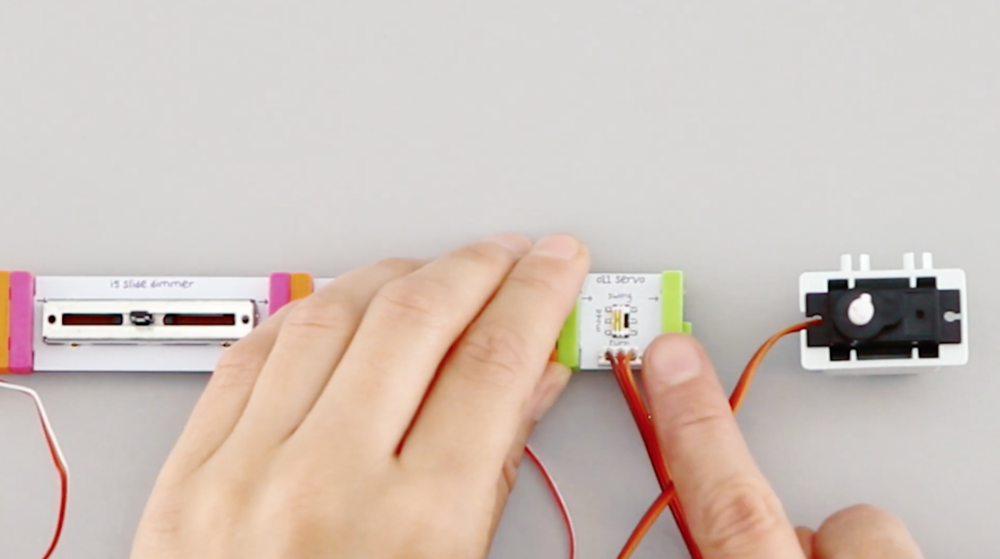
Step 1: Attach the battery, power bit, wire bit, slide dimmer bit, wire bit and servo bit together.

Step 2: Set the servo bit to TURN mode for this invention.

INVENTION THUMBNAIL.png

Step 1: Start by sliding your mounting board into the two flaps with bit holes of the first gripper arm you made (template #2).

Step 2: Attach the battery onto bit holder "C" and attach power bit onto bit holder "D" like so.

Step 3: Flip over template and attach the servo motor (not green servo bit) onto the bit holder labeled SERVO.

Step 4: Slide the mounting board into the hand bound (purple box) like so.

Step 5: Attach the green servo bit onto the bit holes of the hand mound (purple box) like so.

Step 6: Push the slide dimmer into the bit holes on the side of the hand mound like so.

Step 7: Now, power on the power bit.

Step 8: Slide the switch all the way to the side marked "Wire In."

Step 9: Now that the servo has been zeroed out, we can now assemble and attach the moving arm.

Step 10: Slide the arm into the a the other template gripper arm like so.

Step 11: Then attach the end of the arm onto the black motor below.

Step 12: Now, your invention is finished!

T-1.pngStep 1: This invention requires us to build out three templates. The first template is Template #2.Step 2: Template #2 is the one on the left, save the one on the right for later but not now. Step 3: Start folding and unfolding all the dotted lines downward like so.Step 4: Then start folding and unfolding all the solid lines upward like so.Step 5: Next, start folding and matching the numbered faces in order from #1 to #7. Step 6: See how Face #1 and #2 are folded onto their matching faces.Step 7: Now, let's fold together Face #3 to match with the other face #3Step 8: Fold numbered faces #3 together like so.Step 9: Fold face #4 to match with other face #4.Step 10: Continue folding face #5, #6, #7 to match with their opposite faces. Step 11: Next, insert tab #8 into slot #8.Step 12: Now, lets fold the faces #9 together. Step 13: Hold the faces together and insert the tabs into the slots to hold in place. Step 14: This is one side of the Gripper. Now lets move onto the next template. Step 15: This time we will be working with Template #1.Step 16: Fold and unfold all dotted lines downward like so.Step 17: Fold and unfold all solid lines upward like so.Step 18: Now, lets start folding and matching the numbered faces in order from #1 to #9.Step 19: Next, fold together and match numbered Face #3.Step 20: See how the face #3 is folded together with the other face #3.Step 21: Next, fold and match numbered face #4 with the other face #4.Step 22: Fold and match numbered face #5 with other face #5.Step 23: Fold and match numbered face #6 with the other face #6.Step 24: Fold and match numbered face #7 with the other face #7.Step 25: Insert tab #8 into slot #8.Step 26: Fold together and match face #9 with the other face #9.Step 27: Hold the faces together and insert the tabs into the slots to hold in place. Step 28: Now, your second piece is finished. Next, we will move onto our last template to build.Step 29: The last template we will build is Template #3.Step 30: Start by folding and unfolding all dotted lines downward and solid lines upward like so.Step 31: Next, fold and match numbered tabs and faces in order from #1 to #6.Step 32: Next, insert tabs #2 and #3 into slots #2 and #3. Step 33: Fold at the solid line to insert the tabs #2 and #3 into the slots like so.Step 34: Pull the tabs and lock them into place like so.Step 35: Next, insert tabs #4 and #5 into matching slots #4 and #5. like so.Step 36: Then fold the tabs facing upwards into the slots to hide them.Step 37: Flip over the template and fold face #6 over matching other face #6.Step 38: Now, you have the last finished template. Now to build our circuit for the invention.C.pngStep 1: Attach the battery, power bit, wire bit, slide dimmer bit, wire bit and servo bit together.Step 2: Set the servo bit to TURN mode for this invention.INVENTION THUMBNAIL.pngStep 1: Start by sliding your mounting board into the two flaps with bit holes of the first gripper arm you made (template #2). Step 2: Attach the battery onto bit holder "C" and attach power bit onto bit holder "D" like so.Step 3: Flip over template and attach the servo motor (not green servo bit) onto the bit holder labeled SERVO.Step 4: Slide the mounting board into the hand bound (purple box) like so.Step 5: Attach the green servo bit onto the bit holes of the hand mound (purple box) like so.Step 6: Push the slide dimmer into the bit holes on the side of the hand mound like so.Step 7: Now, power on the power bit.Step 8: Slide the switch all the way to the side marked "Wire In." Step 9: Now that the servo has been zeroed out, we can now assemble and attach the moving arm.Step 10: Slide the arm into the a the other template gripper arm like so. Step 11: Then attach the end of the arm onto the black motor below. Step 12: Now, your invention is finished!


Play


PLAY: Try out your invention! 


iD6IfBZW.png

sdQIPs8-.png


Remix


REMIX: Update or Improve your Prototype

How can you use Bits and craft materials to improve or customize your invention?

Here are some more ideas:

  • Make it Automatic with the Sound Sensor and Latch Bits

    • Watch the following video playlist for a guided remix:

      • Create Auto Gripper

      • Play Auto Gripper

      • About the Latch

  • Add Bits

    • How could this change or improve your invention to help someone complete a task?

      • Can you add a long LED to make it easier to pick things up in the dark? How about a buzzer Bit?

  • Add Other Craft Materials

    • Give your gripper some personality - does it look like an animal or part of a superhero suit?

      • Use stickers or add other craft materials and get creative here.

    • Are there other materials you can add to change or improve functionality?

      • Can you make the scoop bigger or add a pipe cleaner to create a hook?

        • Try out different materials that are available to you.


SHARE: Share your invention with friends or family! 

Here are some ideas how you can share about your invention:

  • Create a story about your invention.

  • Talk about the updates or unique features you added to the original prototype and why you decided to make these changes.

  • Snap photos of your final invention and send to your site coordinator!

Share

CONGRATULATIONS, YOU HAVE COMPLETED YOUR PROJECT!


Resources

Inspirational Links:

Nose Blowing Machine

Helpful Links:

DCI STEM STEM Kit Overview

DCI STEM STEM Kit Bit Index

littleBits Basics

littleBits Troubleshooting

littleBits Invention Cycle


Tips & Tricks:

Servo Modes