Robo Arm
¡Cree un dispositivo gripper que le ayuda a agarrar la materia!
Cuando usted trabaja por la sesión, asegúrese para examinar todos los diagramas de Bits para aprender como los Bits trabajan y como ellos están relacionados con el verdadero mundo. Usted también puede encontrar la información sobre cada Bits en el Snap the Gap STEM Bit Index.

Inspirar
Exploración de Carrera
Explora estas dos mujeres que han hecho contribuciones significativas en las carreras de STEM. Por favor toma unos minutos para leer sus historias en las tarjetas abajo y piensa en lo siguiente:
- ¿Puede usted verse en sus trabajos?
- ¿Estás interesado en aprender más sobre sus trabajos?
- ¿Qué te inspira seguir estos modelos?


Descargue las cartas de Mujeres en STEM aquí:
UMA CHOWDHRY GWYNNE SHOTWELL
VIDEO INSPIRADOR DE LA INVENCIÓN DEL DÍA
Estos videos muestran diferentes formas en que las máquinas pueden ayudar a las personas en su vida diaria.
Simone Giertz Nose Blowing Machine - ingeniero que hace hilarantes máquinas “útiles”
Crear
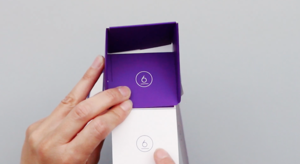
Robo Arm
¡Cree un dispositivo gripper que le ayuda a agarrar la materia!

CREAR: Mira la lista de videos a continuación para obtener instrucciones de construcción para crear el Gripper.
-
Introducción a los wearables
-
Crear Gripper
CREAR: Vea la siguiente presentación de diapositivas de fotos sobre cómo construir su invención Robo Arm / Gripper.
-
Construyendo su plantilla
-
Construyendo su circuito
-
Construyendo tu invención


Jugar
JUGAR: ¡Prueba tu invento!


Remezcla
REMEZCLA: Actualice o mejore su prototipo
¿Cómo puedes usar Bits y materiales de manualidades para mejorar o personalizar tu invención?
Aquí hay algunas ideas más:
-
Hágalo automático con el sensor de sonido y los bits de cierre
-
Mira la siguiente lista de reproducción de video para un remix guiado:
-
Crear pinza automática
-
Jugar Auto Gripper
-
Sobre el pestillo
-
-
-
Añadir bits
-
¿Cómo podría esto cambiar o mejorar su invención para ayudar a alguien a completar una tarea?
-
¿Puedes agregar un LED largo para que sea más fácil recoger cosas en la oscuridad? ¿Y su Buzzer Bit?
-
-
Agregar otros materiales artesanales
-
Dale personalidad a tu pinza: ¿se parece a un animal o parte de un traje de superhéroe?
-
Use calcomanías o agregue otros materiales de artesanía y sea creativo aquí.
-
-
¿Hay otros materiales que puede agregar para cambiar o mejorar la funcionalidad?
-
¿Puedes agrandar la pala o agregar un limpiapipas para crear un gancho?
-
Pruebe diferentes materiales disponibles para usted.
-
-
-
-
COMPARTIR: ¡Comparte tu invención con amigos o familiares!
Aquí hay algunas ideas sobre cómo puede compartir sobre su invención:
-
Crea una historia sobre tu invento.
-
Hable acerca de las actualizaciones o características únicas que agregó al prototipo original y por qué decidió hacer estos cambios.
-
¡Toma fotos de tu invención final y envíalas al coordinador de tu sitio!
Compartir
¡FELICITACIONES, HAS COMPLETADO TU PROYECTO!
Recursos
Enlaces Útiles:
Conceptos básicos de littleBits
Ciclo de invención de littleBits
Solución de problemas de littleBits
Snap The Gap STEM Kit Overview
Snap The Gap STEM Kit Bit Index
Enlaces inspiradores:
Consejos y trucos: